Documentation Index
Fetch the complete documentation index at: https://docs.matia.io/llms.txt
Use this file to discover all available pages before exploring further.
Overview
This guide walks you through creating your first integration in Matia, from connecting your source and destination to running your initial sync. In this guide we will create an ETL integration.1. Add a New Integration
Start by logging into your Matia workspace. In the main navigation sidebar, click on Integrations to access the integrations overview page. Click the Add Integration button. This will open the integration setup wizard, guiding you through each step.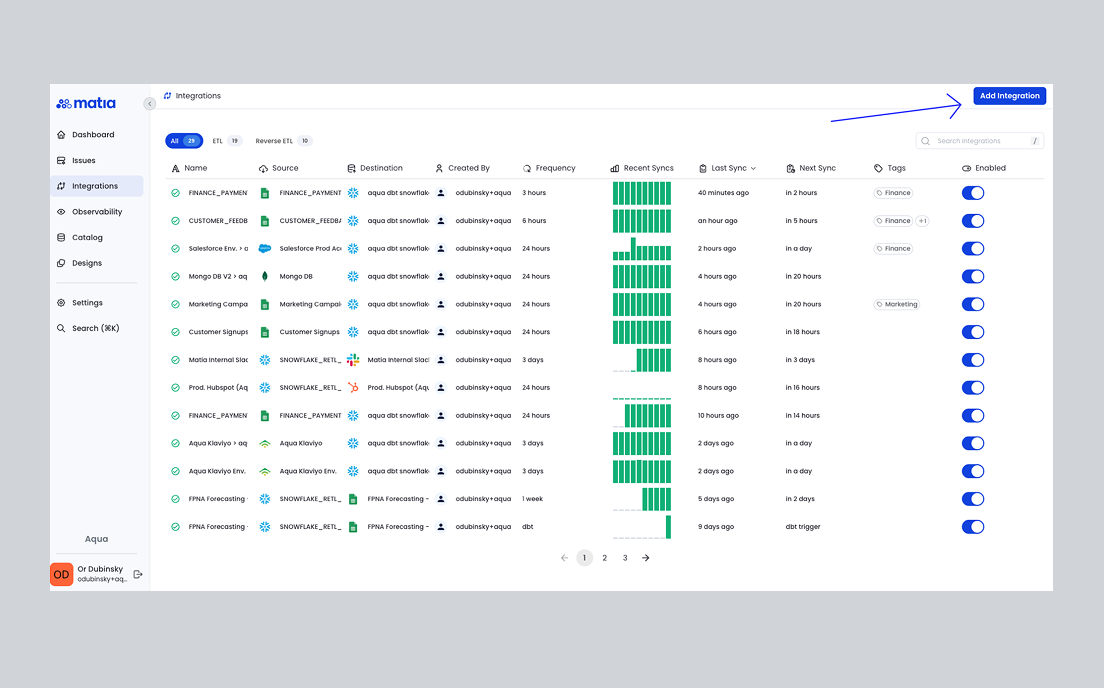
2. Select and Connect Your Source
For this example, we’ll connect Salesforce as the source.- In the source selection screen, search for and select Salesforce.
- Choose whether you’re looking to connect a Salesforce production or sandbox environment.
- Use the Connect with Salesforce button to authenticate via OAuth. This process is straightforward—simply follow the prompts to log in to your Salesforce account and authorize Matia.
- Once authenticated, fill out a name for your new source and select Test Connection to verify that the authentication was successful.

3. Select and Connect Your Destination
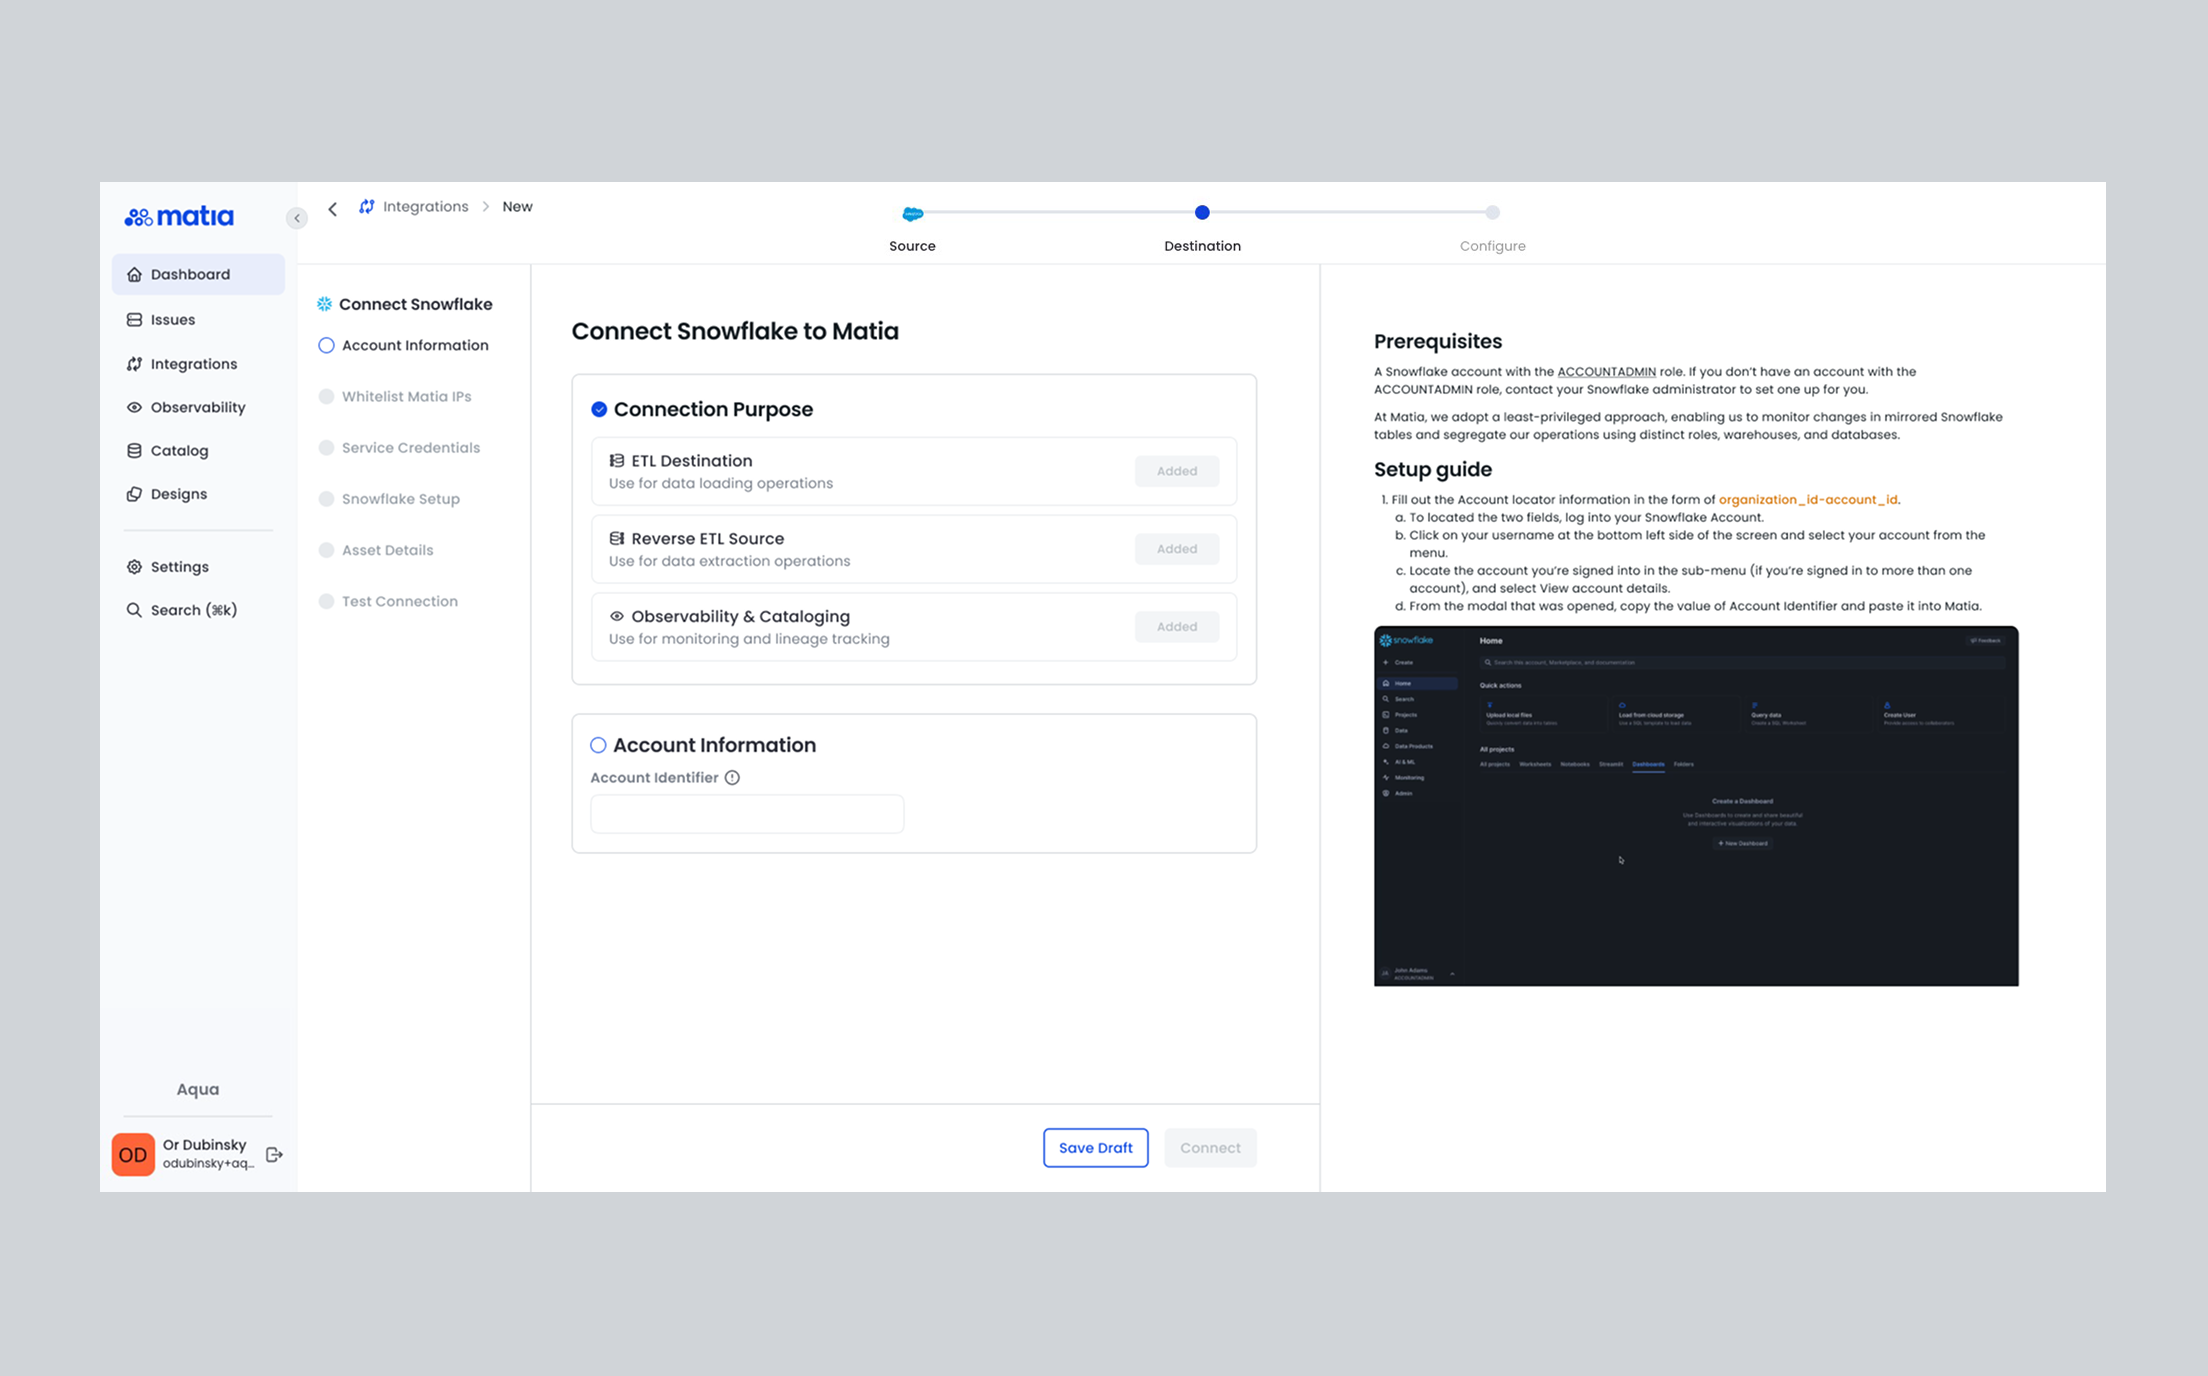
Next, set up your destination. We’ll use Snowflake as the example.- In the destination selection screen, search for and select Snowflake.
- Follow the steps in the detailes setup guide walking you through configuring your your Snowflake account details.
- Click Test Connection to ensure everything is set up correctly, then click Save.
4. Define the Integration
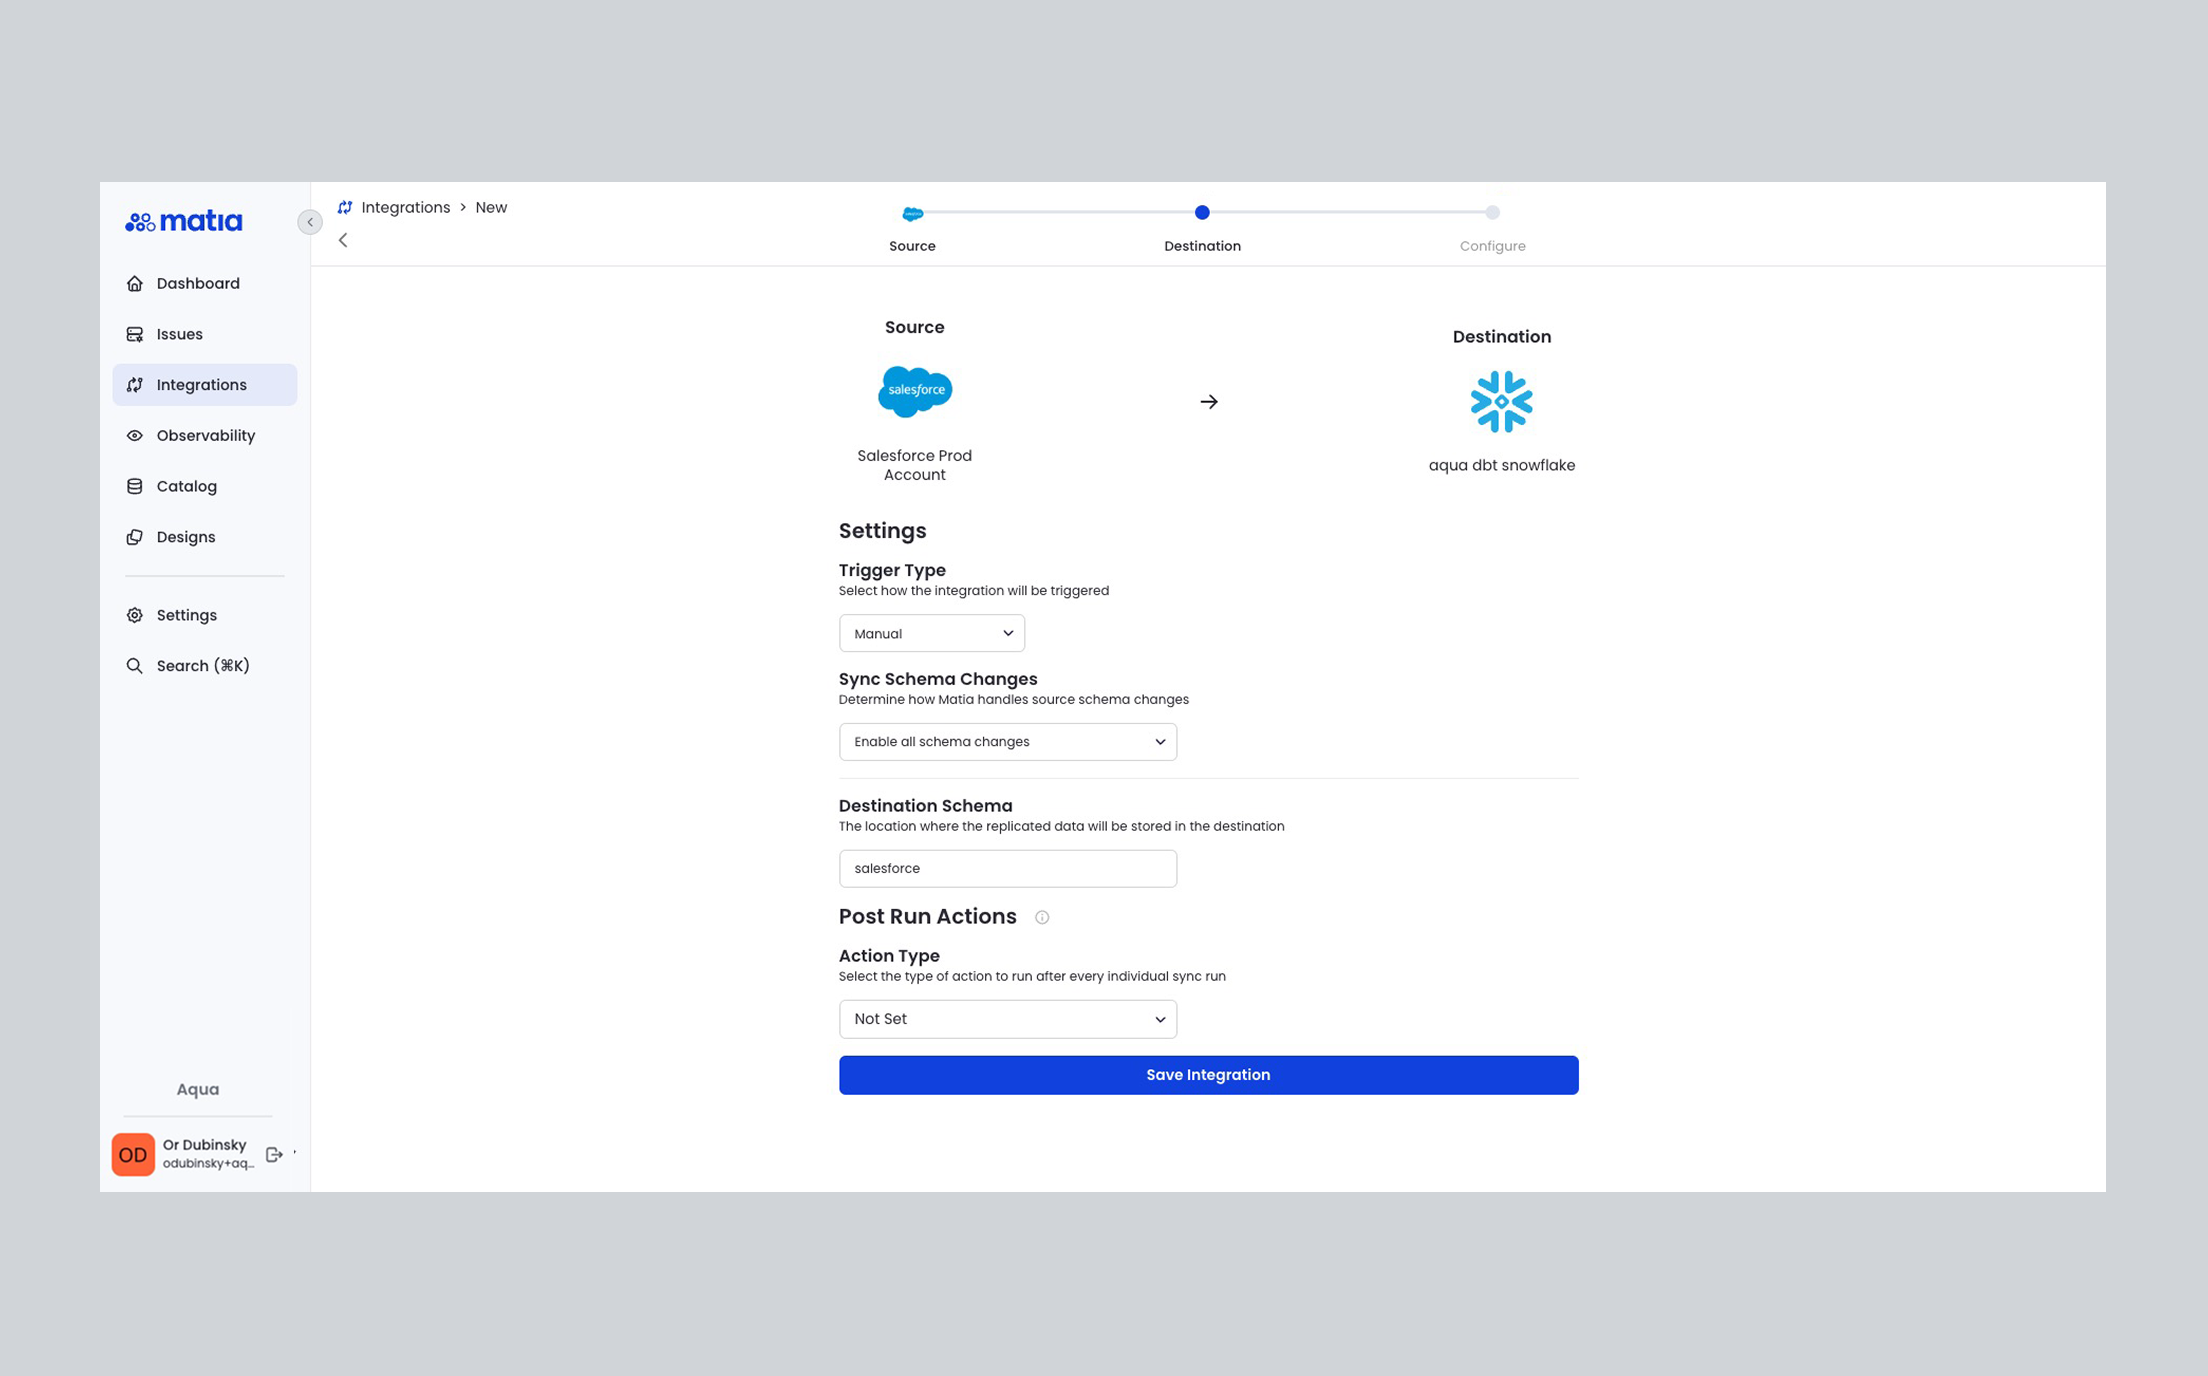
You’ll now configure your integration details:- Choose a trigger type for your syncs:
- Manual: Run syncs on demand.
- Fixed Interval: Set a schedule such as every 6 hours, with a customizable base time.
- Cron Expression: For advanced scheduling, enter a cron string (e.g.,
0 2 * * *to run every day at 2:00 AM).
- Select how you’d like to handle Schema Changes:
- Enable all schema changes: Automatically add data from new schemas, tables, and columns as they appear in Salesforce.
- Enable only new columns: Add data from new columns, but ignore new schemas and tables.
- Ignore all schema changes: No new data structures will be added automatically.
- Select the destination schema in Snowflake where Matia should save the data.
5. Choose Your Integration Schema
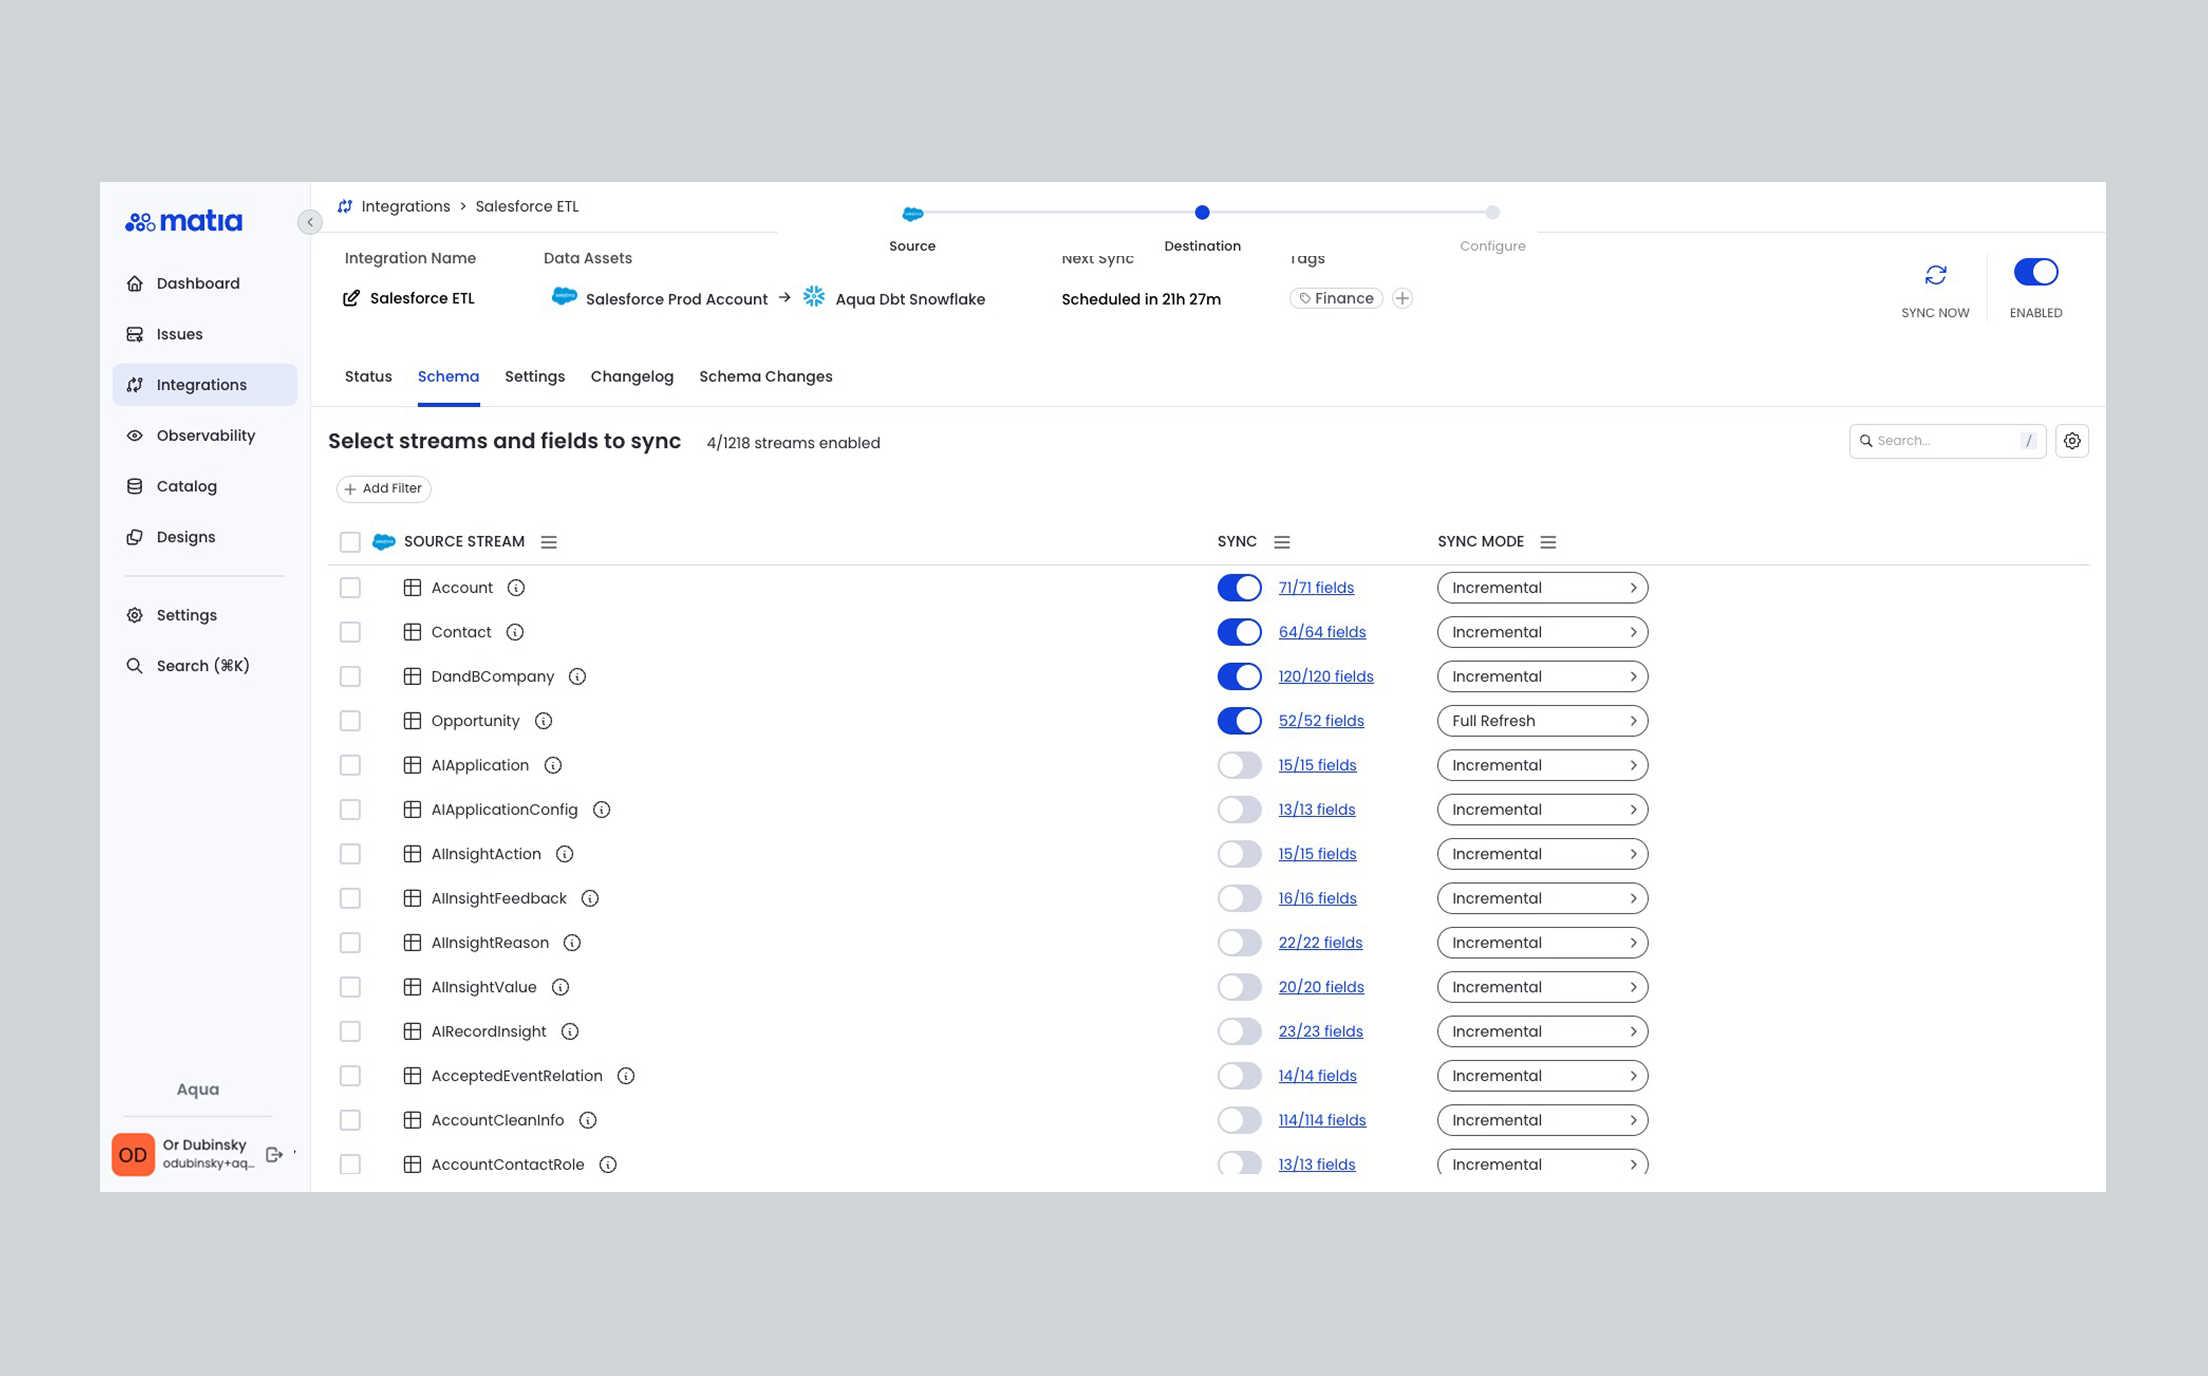
- Using the Schema Tab, decide whether to bring in all Salesforce-supported tables or to modify the integration schema and select only the specific streams and fields you need.
- Matia allows you to enable/disable individual tables and columns, so you can control exactly what data is moved.
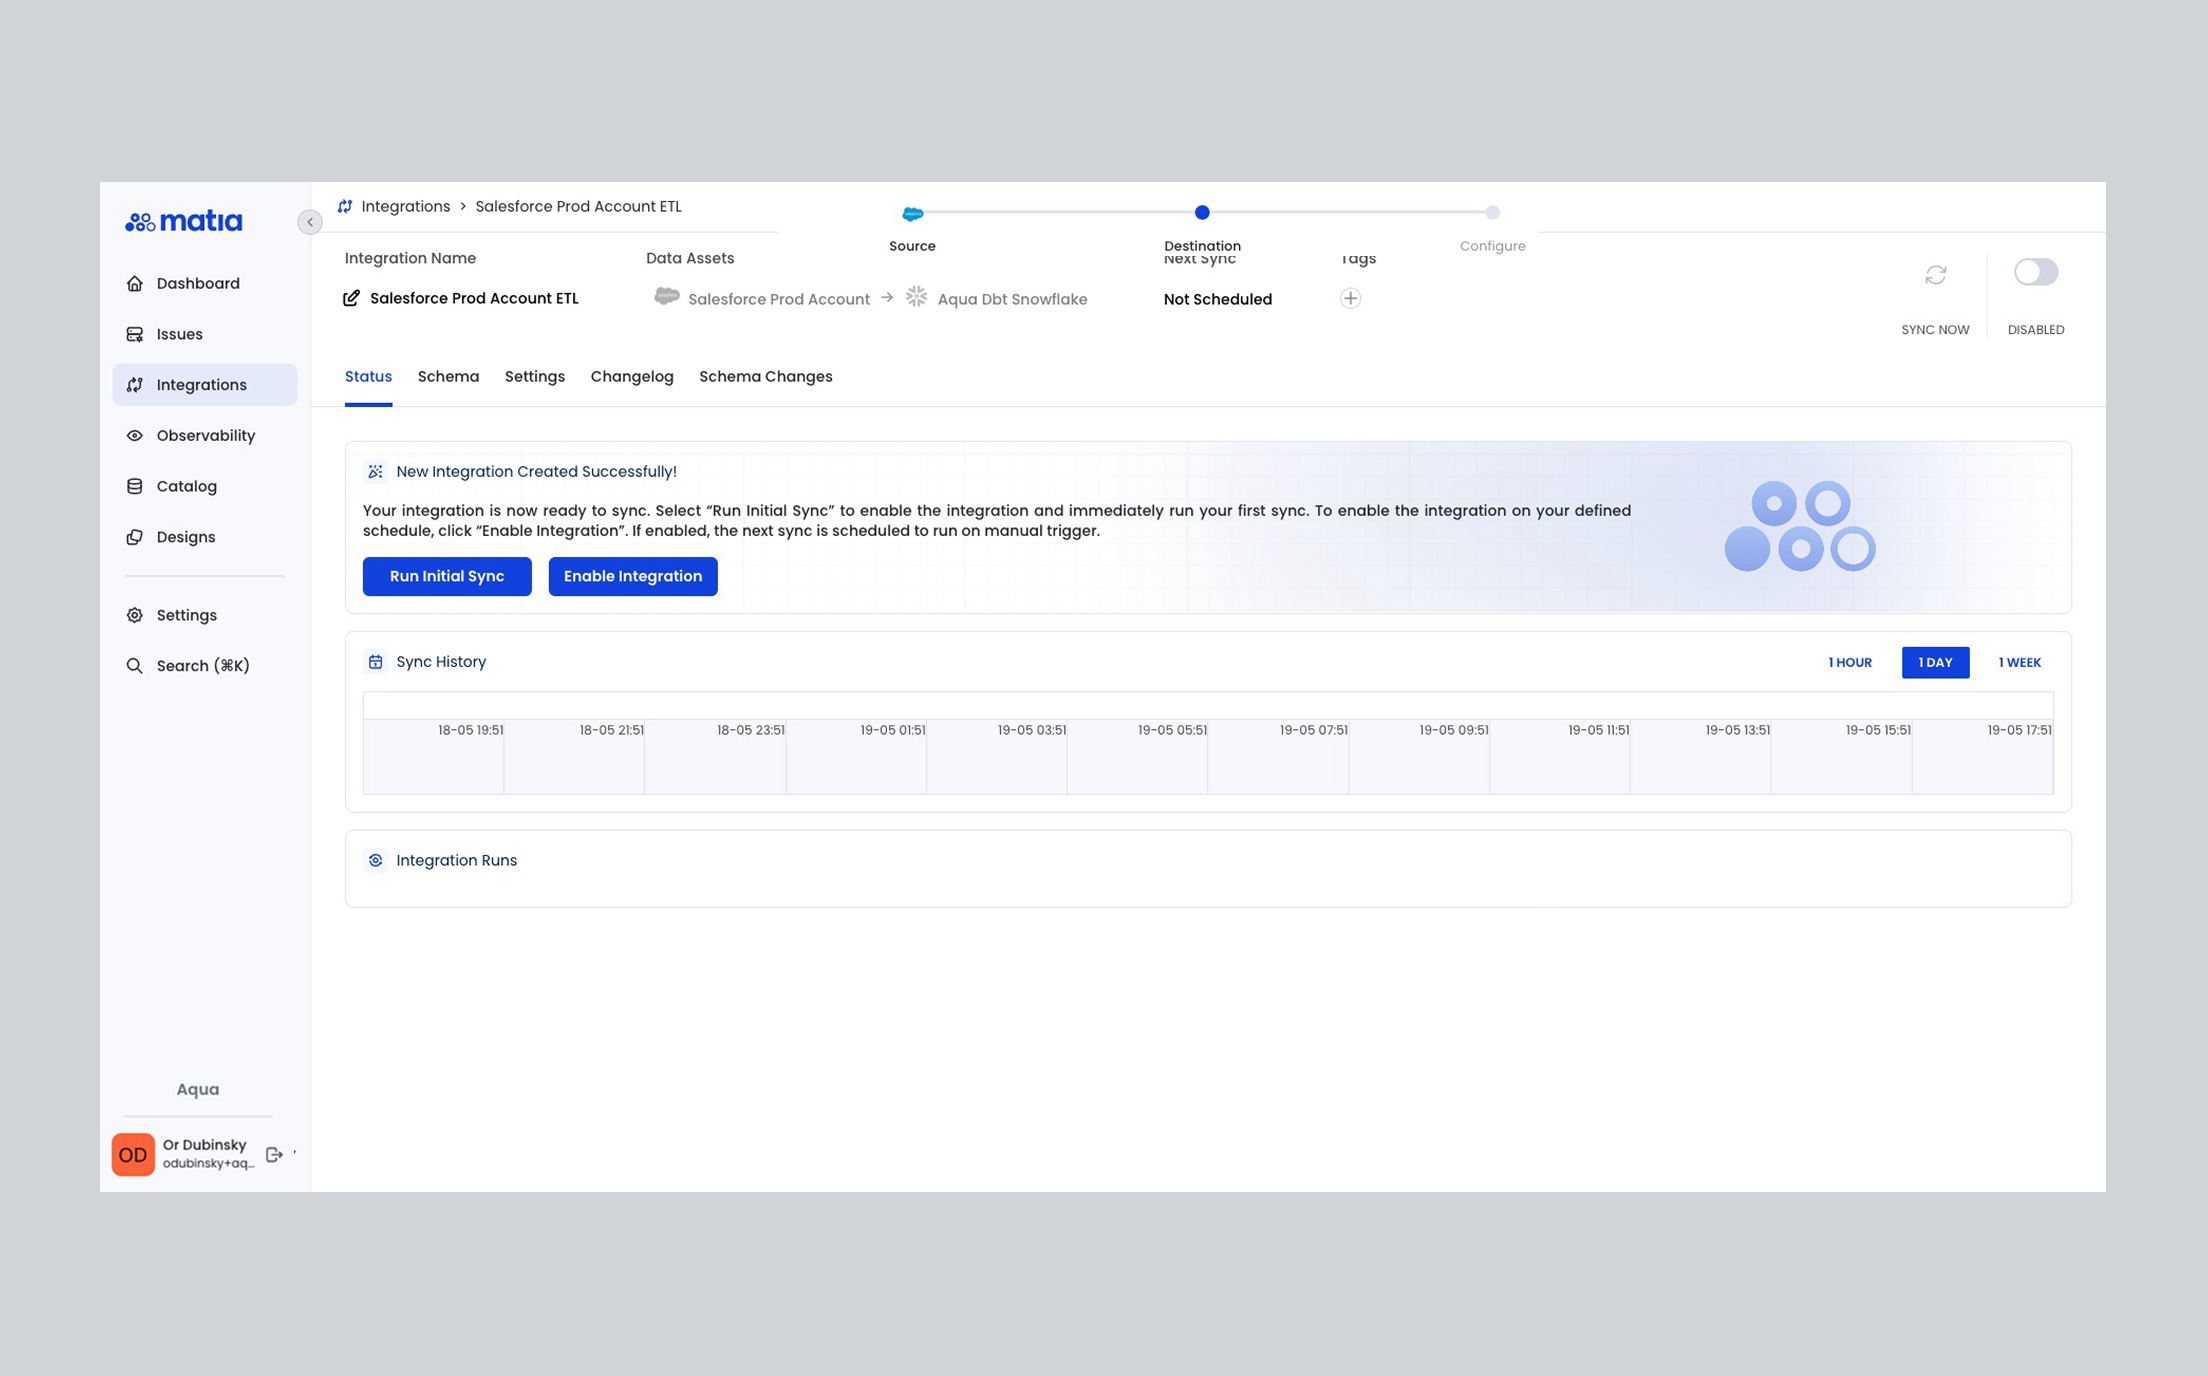
6. Enable and Run the Integration
- Once your schema is set, click Run Initial Sync to start your first data transfer. Matia will extract data from Salesforce and load it into your chosen Snowflake schema.
Next Steps:
Explore data observability features, set up post run actions, or review integration sync data for deeper insight into your new pipeline.